Sunday, August 26, 2012

Quilting and Math - OH MY!

When I first thought about quilting I was a small child.  I don't even know if I understood math at that time, and I know I didn't realize how math and quilting would go together.

As an adult I am thrilled to use some of those math skills that I so laboriously learned in school!  Today's lesson is in geometry and HEXAGONS!!! 

Lets go back to the beginning of quilt philosophy.  I believe that the outcome of a quilt is directly linked to the beginning of the quilt.  I've found that if I take my time and make sure my pattern is exact, my cutting is exact (or as exact as I can make it) and I double check things before I assemble them - I usually have a much better outcome.  Not only does the quilt look better, but my temper and patience aren't nearly as taxed.

When I started working with hexagons (6-sided figures, each side equal in length with 60 degree angles) I bought premade paper patterns.  This solved the problem of making sure the patterns were perfect, but it did three things that I didn't like:
  1. It COST MONEY!!! (I hate spending money if I can do it myself)
  2. It made me dependent on someone else - if I ran out of patterns at 11:00 on a Sunday evening (yes, sometimes I quilt late at night) how would I handle it?  What if my LQS (Local Quilt Store) was out of those patterns? 
  3. I was not able to customize the size for what I wanted.  I love to use pictures and ideas as inspiration for my quilts.  I don't always follow directions - I make up my own as I go (yes this can cause problems, but once you do this enough you'll usually be able to dig yourself out of those problems)
So let me explain how these patterns are used.  There is an old pattern called, "Grandmother's Flower Garden" today this is known as "English Paper Piecing".  In days gone by, women cut hexagons out of whatever paper they had, many times it was a newspaper or an old Sears's catalog.  She would use scraps of cloth from whatever and eventually, when she had enough pieces she would assemble a quilt top.  She would usually put a solid in the center and printed material around the edges to form a "flower".  Here are some samples of pictures I found on the web:

I can tell you there are at least 1,000+ different ways to use these little hexagons!

You need to make paper hexagons for each of these pieces of fabric.  The fabric is actual sewn to the paper, then the hexagons are sewn together and lastly the paper is pulled out.  So can you imagine how many of these you'd need to do a simple project?  Yep - a bunch.  So lets learn how to make the hexagons.

Step 1 - Figure out how big you want the hexagon.  You'll see them referred to as say a 1.5" hexagon, 2" hexagon etc.  this refers to the length of each side (all 6 sides of the hexagon are the same length).  I don't pay much attention to these references.  I rough draw the size I want for the project I want to make.  For instance, when I did an all white on white dresser runner I used hexagons that were about 1.5" and when I made hexagons for my table topper I used a size about 3.5".  The beauty of doing this yourself is YOU can control the size!!

Step 2 - Gather the materials you'll need.
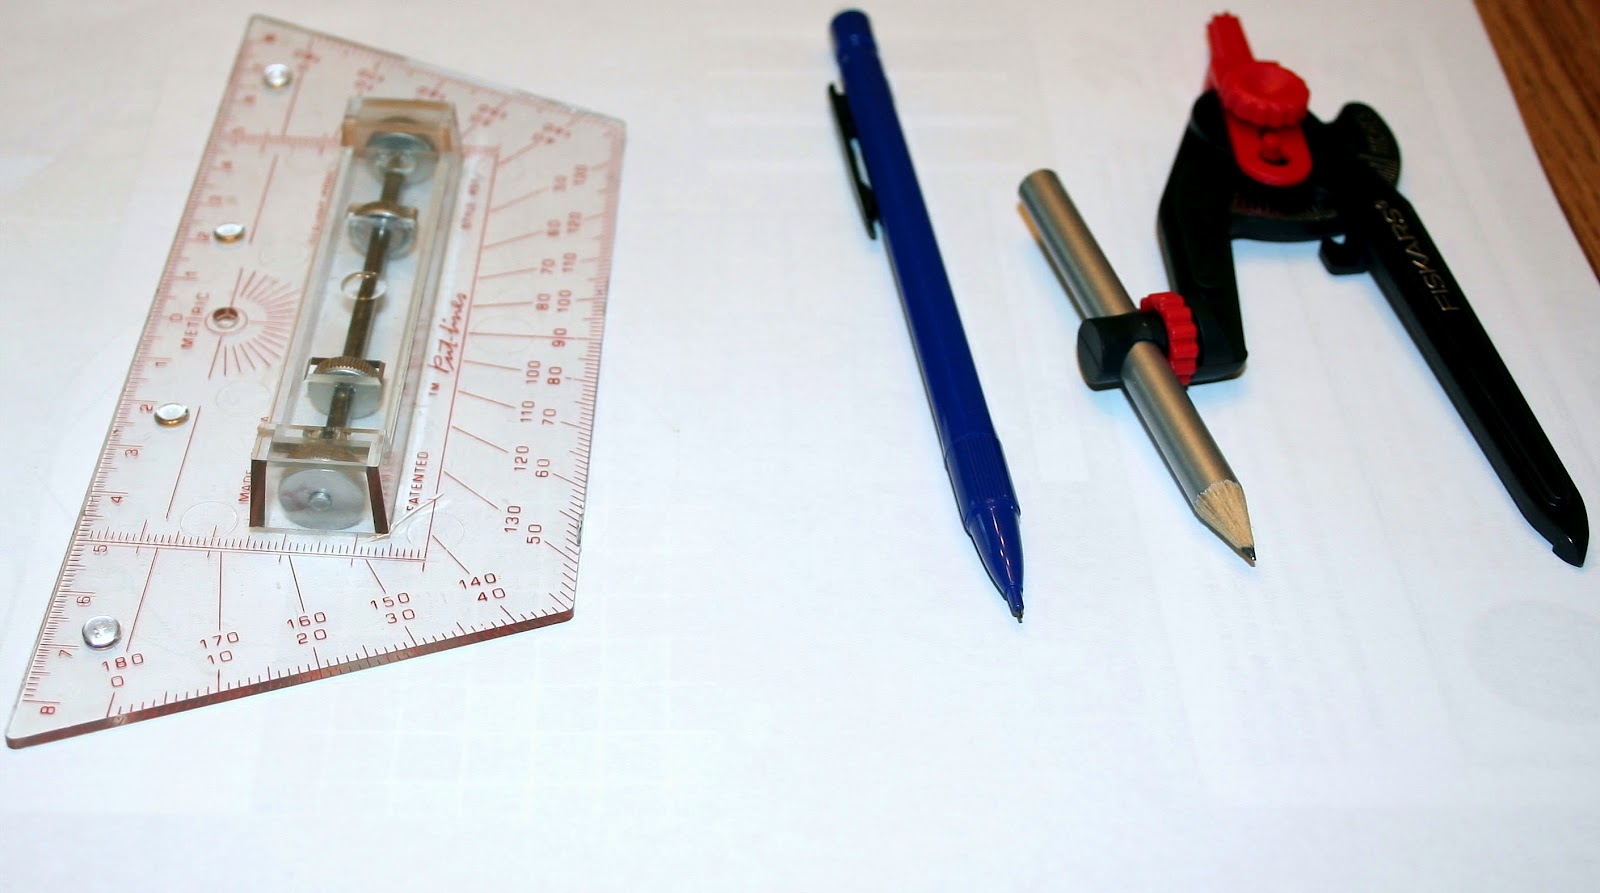
You'll need:
  1. Ruler
  2. SHARP Pencil
  3. Compass
  4. Paper
  5. Maybe a magazine or something thick so that the point of the compass doesn't scratch your table top
Step 3 - Draw your rough sized hexagon, then calibrate the compass to draw a circle the same size as the hexagon you've rough drawn.  I also make a dot where the center of my circle is located coinciding with the point of the compass. DO NOT CHANGE THE COMPASS SETTINGS, LOCK THEM IN WHEN YOUR CIRCLE IS THE CORRECT SIZE!

Step 4 - Draw a line through the center of the circle, through the dot that you drew in step 3

Step 5 - Using your compass (with the EXACT same settings as you used to draw the circle) put the point of the compass on the point where the line bisects the circle then draw a small mark with the pencil of the compass to bisect the circle on the left and on the right


Step 6 - Repeat step 5 for the other end of the center line and when you're done the drawing should look like this.

Note you have SIX marks on the circle, the two you created in step 4 with the line, the 2 you drew in step 5, and the 2 you drew in step 6.

Step 7 - Connect the dots!  Use your ruler to draw a line between each of the marks on the circle - you will draw SIX lines.


When you're done with step seven the drawing should look like this

Step 8 - Now cut out your master hexagon
Step 9 - I call this my DOUBLE CHECK step.  I cut out 5 or six patterns out of paper and then put them together to make SURE that the hexagons are correct.  If you did everything above, took your time and made sure you were precise it should look like this.

That is all there is to it!  You've made your hexagons.

What's around the corner?  I will create a new page on the blog for instructions on how to make a project using your newly made hexagons.

Saturday, August 25, 2012

Seen in my Garden

I don't have a huge garden, but I love to tend what I have.  For the past few years I've been attempting to grow flowers native to this region.  This year I stumbled on a beautiful flower - the cone flower.
They come in many different colors.  The flower matures differently than any other flower I've seen.  The center forms and looks exactly like the centers in the picture.  Then spikes appear to grow out (these will become the petals).  They are tightly rolled and you can't tell what color they will be.  Slowly, over a day or so the spikes unroll and form the petals.  It is very interesting to watch.

On another note cone flowers attract butterflies!  You can see the yellow tiger swallowtail above and here is his cousin the black swallowtail:
When I first snapped this one I was ready to toss it out, but I was amazed at the detail of the blue on his wings.  It looked like fairy dust to me.  He is just a pretty butterfly.

And of course one of my favorite garden visitors are my fat bumblebees.  I'll admit that this one was on a weed near the edge of the garden bed, but he was so BUSY.  I love it when they land on a flower to collect the pollen, but they are so fat that the flower bends.  Bumblebees are so dedicated to collecting their pollen.  I love watching them.
I find a great deal of peace working in my garden.  I often sit and look at the beautiful plants and find myself wondering on God's creative genius.  Digging in the dirt and planting things that will grow and flourish nourishes my soul.  I love to create things and I love to assist plants as they create flowers.  Most of all I enjoy when wildlife visits the garden to partake of its bounty.

What's around the bend?  We are trying out two recipes this weekend that I'll blog on!  Stay tuned for a pork loin with sauce and my favorite salmon cakes!!!

Wednesday, August 22, 2012

Cats for People Who Don't Know Cats

This subject was on my mind this morning.  You see we adopted our cat without really knowing anything about cats.  I've had barn cats etc., and I had one indoor/outdoor independent cat (I'm not sure it is fair to say "I had" for him) but this would be our first indoor cat.

Sitting by the backdoor chattering at birds on the deck.  We feed the birds from the side of the deck and Caruso LOVES to sit and watch them.
We made a few mistakes along the way, some of which weren't too bad, and a few we had to change IMMEDIATELY or Caruso would suffer.  I can't stress enough that a GOOD VET is your best source of information!  However, if I called my Vet every time I had a question I don't think she would be our Vet for long!  I tend to do research on the web.  When I find something that looks credible I do cross reference it and make sure it isn't just a wild idea. 

He LOVES quilts, and quilts in a beam of sunshine
 is irresistible to him.
 Tidbits I've learned
Did you know that you should be feeding and offering water to your cat out of stainless steel bowls?  I didn't until we found out the hard way.  First of all ceramic and plastic bowls have surfaces that aren't smooth (yes even though the ceramic bowl is glazed and feels nice and smooth) and the irregular surfaces allow bacteria to cling and offers an easy place for it to grow.  Second of all both ceramic and plastic bowls can cause a cat to get "Chin Acne" little blackish pimples!  So we switched Caruso to all stainless steel bowls. 

Did you know that you should be changing your cat's water EVERY DAY?  I didn't know that, but we did it out of concern that Caruso have fresh water!  When we started off with him we had a self watering system.  We thought, "Wow how nice!  Container with clean water, it bubbles when it fills the bowl, and he couldn't tip it."  We couldn't forget to fill it etc.  Boy were we wrong.  First of all the bowl got dirty and slimy quickly.  Since we didn't change the water daily, it was really gross.  A contributing factor to Caruso's kidney problem was he wasn't drinking enough water.  Was it because of our poor choice in water container?  Who knows, but when we threw that out and went to stainless steel - he drinks like a camel who won't see water for days.  (He doesn't have diabetes).  Another note for people how have filtered automatic waterers - you need to change that filter OFTEN apparently bacteria grows there profusely.

Did you know that a cat's water and food dishes should be set apart?  I didn't have a clue until one day, during the course of a conversation, our vet told me that.  I was a bit sceptical but I gave it a try and Caruso loved it!  He drank more and seemed very happy.  The bowls are in our kitchen and they are about 12 feet apart.  I called up my daughter, who has a cat, and told her.   She gave it a try for her cat and again he LOVED the new setup.  You may want to give this a try in your home.

I do not use the pretty nylon collars anymore.  Caruso would scratch the collars and eventually they would become unsightly - but that isn't why we don't use them.  When he would scratch, sometimes he'd hook a thread and pull which tightened it on his neck.  Our vet suggested and we have switched to "Beastie Bands for Cats" I found them for about $6.00 each on Amazon.

What's around the bend?   I don't have any specific ideas about posting on cats - but if you have any hints or ideas, please comment below and I'll share them with the blog!

Monday, August 20, 2012

Vegetable Garden Test

More on our gardens!

My husband has spent his life either in a very urban setting or stationed on military bases all over the world - none of which truly allowed him time to plant a vegetable garden.  This year he agreed to let me try adding vegetables to my flower gardens.  You see, adding gardens in this area is a MAJOR undertaking as you have to dig (drill) through clay and then add dirt etc.  Or you can do something called raised bed gardening (on my to do list in a year or so).  Since it is just the two of us, we don't need a huge vegetable garden (yet), so I thought I could utilize garden beds that were already in existence and just add my veggies to it!

Rather than overwhelm ourselves with tons of things, I decided to try out 5 tomato plants, 2 cucumbers, 2 squash and 4 yellow pepper plants.

They resemble small trees - but they are just a few tomato plants.  These are all over 5 foot tall and have thick branches held up by the metal cages.
My tomatoes grew wildly - beyond my expectations!  It is VERY dense in the tomato area.  We have fresh sweet tomatoes all week long.  I planted a variety to see what we liked.  Honestly next year I'm going to try out new ones as none of these were exactly what I wanted.

With the horrible heat wave baking us this summer, I lost my squash and cucumbers.  I watered every day, but to no avail.  I can only take heart that other people (who are much more knowledgeable than I) lost their squash and cucumbers too!  So next year I have high hopes to try again!!

My yellow peppers!  In the beginning they struggled and then took.  Each plant had one pepper growing.  We were so excited.  Then the heat wave... UGH... cooked peppers.  I thought for sure that was it.  I was wrong.
This is only two of the pepper plants! There are two more beside them.  Look at the bounty of peppers!!
My peppers LIVE!  They are all offering us peppers - many peppers.  I can see some lovely bags of peppers in the freezer to bring out in the dead of winter!

I hope you enjoyed this tiny peek into my gardens.  I should share my husband's reaction to our attempt at farming.  He is thrilled.  I think he would make a great farmer.  He loves to work on the plantings, weedings, caring and harvesting of the plants.  He loves to eat the fruit of our labor.  I'd plant 100 tomatoes to see his happy smile when he bites into the tomatoes!

Just around the bend - I'm thinking about trying some hydroponic herb gardening under grow lights in my basement this winter.  I'll keep you posted when I figure that out! 

Sunday, August 19, 2012

Crepe Myrtles

We love to garden!  Unfortunately, we live in an area that is almost 100% clay but I'm slowly overcoming that hurdle. 

Moving to Virginia from the north was great, for many reasons!  I found a whole new variety of plants to enjoy!  Hands down, my favorite local lovely are crepe myrtles.  I have 6 of them in my yard, and if my hubby didn't rein me in I'd probably have 60!  They come in all colors, shapes, sizes and they bloom at different times from spring to summer.  Here are two of mine and a close up of the flower clusters.  One thing to note is these were taken about 12 hours after a heavy rainfall, the stems/branches are bent slightly from the weight of the water on the heavy blooms.


I am working on getting more gardening pictures together to post, but I wanted to share these with you as they are my favorites. 

Surprise in my Garden

Today is one of those perfect "Summer is Winding Down" days in Virginia.  It is cool and rainy today.  My husband was on the covered front porch enjoying a cup of coffee and his newspaper when I went outside to visit.

As I sat in my chair and chatted I noticed someone had come to visit my garden.  Now I'm NOT a fan of spiders - but this one was too pretty to not take a picture of.  I also loved the way the web is sprinkled with water droplets.


I'm not sure but I believe he is a type of garden spider.


Monday, August 13, 2012

Plattsburgh, NY

We just returned from several days in Plattsburgh NY, where we attended a good friend's daughter's wedding.

I love Plattsburgh!  It is on Lake Champlain and it is just a lovely place.  Having visited our friend, and her family, several times I was forced to look up some information on this area.  Here is a map of the lake:

And here is a good link for information on the lake: http://en.wikipedia.org/wiki/Lake_Champlain

Did you know that there are legally SIX Great Lakes?  Yes there are! Lakes Huron, Ontario, Michigan, Erie and Superior are the five that most people are familiar with.  However in 1998 Lake Champlain was named (officially) the sixth great lake.  Here is a link to that information:  http://www.dencities.com/champlain.html

Did you know that Lake Champlain has its' own legendary monster?  Probably not as well known as Nessie in Scotland, but nonetheless - here is some information on Champy.  By the way, I've looked for her whenever we are visiting the lake, but alas, nothing seen - YET!!  http://www.csicop.org/si/show/measure_of_a_monster_investigating_the_champ_photo/  And here is another website with some more informaion:  http://www.genesispark.org/exhibits/evidence/cryptozoological/plesiosaurs/champ/

Did you know that in 1814 the first military base was located in Plattsburgh?  This base evenutally became the Plattsburgh Air Force Base and it was closed in 1995 by the BRAC (Defense Base Closure and Realignment).  "The original military reservation consisted of only 200 acres. Additional parcels of land were acquired and stone barracks were built to house "Plattsburgh Barracks" personnel in 1838. Many different types of units have valiantly served  at Plattsburgh over the years using a great variety of weapons, from muskets and cannons to the sophisticated FB-111As and KC-135s. When the base was finally closed, it covered 3,447 acres."  Here is a link to the Wikipedia article I drew a lot of this information from: http://en.wikipedia.org/wiki/Plattsburgh_Air_Force_Base The history of this base is wonderful, colorful and upon reading it, helped me understand some of the War of 1812 better. 

If you ever have a chance to visit this area of our country, I can highly recommend it!  You will be 20 miles (or so) south of the Canadian border and only 55+ miles from Montreal.  The Lake Placid olympic village lies about 40 miles from Plattsburgh and I understand that the outlets in Burlington VT aren't far away either!  There are a ton of historical sites and things to view and learn about.  One of my favorite is a story that was verbally related to me by a long time resident about a tiny island (I would guess the "island" is about the size of a house - a one story rancher - but that is my guess) that lay off the mainland about a 1/3 of a mile.  The story goes that one evening during the War of 1812, the British thought the island was an American ship (I've seen the island in the evening and I can easily see why someone might think that) so they bombed it and expended all of their ammunition trying to sink the perceived ship.  I haven't been able to confirm that verbal story, but it was interesting and it was told to me with a great deal of joy and by a man who was an inate story teller!!!